Liner edges
How to hide pond liner without creating an edge leak
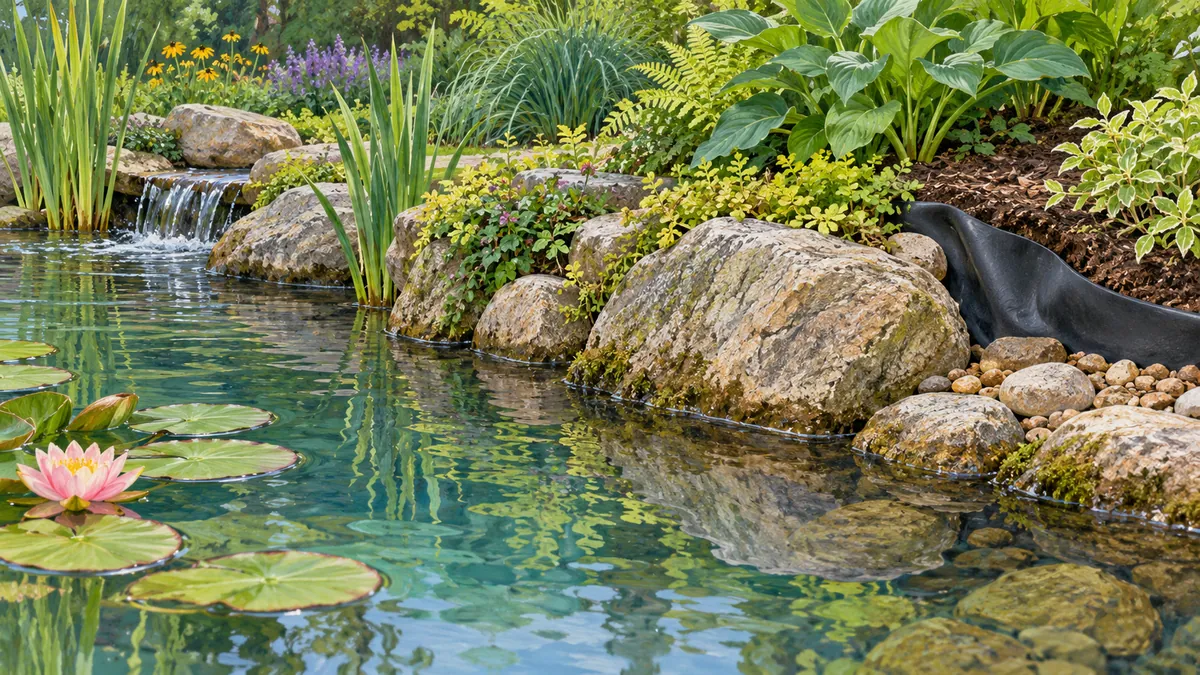
Hide the liner only after you have confirmed that its top edge sits above the water at the lowest point on the perimeter, with the pump running. Keep spare liner behind the finish so the edge can be raised later. Rock, soil and plants are the visible finish. The liner edge is what holds the water. A TEAM Aquascape video on fixing leaks and hiding liner puts the order the same way: edge height first, appearance second.
Separate three things at the edge
An edge detail has three parts that are easy to blur together:
- The finish: the soil, rock or planting people see.
- The water-retaining edge: the top of the liner, which must stay above the water it contains.
- The underlayment termination: where the fabric under the liner stops.
Settlement, splash and wave action are specific to each project, so this article gives no freeboard number. Your liner or kit manual is the place for allowances, fastening and trimming.
Compare three sections before you finish
| Section | What it looks like | What to check before finishing |
|---|---|---|
| A. Concealed raised edge | Liner top above the water, spare liner folded behind soil, rock or plants. | Edge height with the pump running, and whether the fold can be uncovered later. |
| B. Low edge overtopped by running water | Stream or waterfall flow reaches or crosses the liner top at one point. | Water leaving over the edge is a loss path to correct by raising the edge or changing the flow, then rerun. |
| C. Fabric crossing a wet boundary | Underlayment lies over the liner top and touches soil outside the pond. | A condition to inspect, not a guaranteed diagnosis. Cut back or tuck the fabric, then watch for change. |
Find the edge that holds the water
Walk the whole perimeter, including every place a stream, spillway or waterfall lip meets the pond. Mark the lowest liner edge, not the typical one. Aquascape's contractor article on pond design warns against siting a pond where outside runoff collects. If your edge sits beside a slope or hard surface, find out where that water goes before you set the liner height.
If you are still planning, Studio shows the geometry you create from measured dimensions. Compare the layout there, and record the liner edge heights separately on your site worksheet.
Keep liner slack available
In a TEAM Aquascape patio-edge build, the crew trimmed spare liner but left at least four inches so the edge could be raised if it settled, then folded the liner and brought soil to the fold for ground covers.
That figure belongs to that project. Your allowance depends on liner type, pond size, soil and the manual. When you order, the liner calculator works from the dimensions you enter. Set its overhang and optional fold allowance from your installation instructions. Do not count the same allowance twice.
Fold handling also depends on material. PondGard EPDM instructions require a prepared support surface, substrate-appropriate geotextile and panels installed without tension. They cover that product only. Check your own manual before pulling excess liner tight to tidy an edge.
Inspect fabric and wet-soil contact
In a TEAM Aquascape residential pond build, the crew cut back underlayment or pushed it below the liner top after edge rockwork, because the crew identified fabric bridging the liner edge as a possible water-loss path.
That is one build's observation. How fast it happens will depend on the fabric, the soil and how wet the contact is, and the source does not quantify any of these. Treat it as something to look for:
- Look along the edge after the rock is set, since that is when fabric tends to get disturbed.
- Find any fabric that lies over the liner top or reaches outside soil.
- Cut it back or push it below the liner top, then see whether the water loss changes.
Run the system before trimming and burying
In a TEAM Aquascape small waterfall build, a leaky edge appeared when the waterfall first ran, and the crew pulled it up before burying and finishing the edges.
Aquascape's pondless manual says not to trim liner until the basin is filled and the waterfall is running. That manual covers its own kit. For other products, use the manual that came with them.
The Pond Guy's stream guide treats lining, rock placement and equipment as one build sequence. A practical reading for a stream: run the water after the liner and main rock are placed, and before the final trim and burial.
While it runs, look at every edge, and look for wet soil just outside the liner. Note the water level at the start and end of the run. A drop tells you to keep looking. It does not name the fault, because evaporation, splash and leaks can all lower the level.
Worksheet: log the lowest edge, not the average
Measure from the top of the liner edge to the water surface at fixed points with the pump running. Then rerun and measure again. The numbers below are illustrative, not targets.
| Point | First run (cm) | Rerun (cm) | Change (cm) |
|---|---|---|---|
| 1 | 9 | 8.5 | -0.5 |
| 2 | 7 | 7 | 0 |
| 3 | 11 | 10 | -1 |
| 4 | 4 | 2.5 | -1.5 |
| Mean | 7.75 | 7.0 | -0.75 |
The mean for the first run is (9 + 7 + 11 + 4) / 4 = 7.75 cm. For the rerun it is (8.5 + 7 + 10 + 2.5) / 4 = 7.0 cm. The mean conceals the low point: point 4 fell from 4 cm to 2.5 cm. Compare that point with the required edge allowance for your installation, including splash and settlement. At that point, check for settlement of the support, a low liner top and fabric contact before any finishing work. Then raise the edge using the slack you kept, and measure again.
Sequence for finishing the edge
- Set the liner and underlayment following your liner or kit manual, with the edge higher than the intended water line.
- Fill the basin and run the pump or waterfall without trimming or burying anything.
- Log edge heights at fixed points and mark the lowest one.
- Inspect every edge, any place water meets the liner top, and the soil just outside for wet patches.
- Cut back underlayment or push it below the liner top, and recheck after the rock is set.
- Pull up and correct any leaking or low edge before covering it.
- Trim only to the extent your manual allows, keeping spare liner for later adjustment.
- Finish with soil, rock or plants in a way that still lets you uncover the fold if the edge settles.
Sources
- How to Fix Pond Leaks and Hide Liner (TEAM Aquascape)
- YOU Won't Believe This BACKYARD WATERFALL - Part 5 (TEAM Aquascape)
- TEAMING UP for a Residential Recreation POND Build Part 1 (TEAM Aquascape)
- A SMALL WATERFALL Can Fit Anywhere! (TEAM Aquascape)
- How to Design a Dream Pond for Your Customer (Aquascape)
- How to Build a Backyard Stream (The Pond Guy)
- Pondless waterfall installation manual (Aquascape)
- PondGard EPDM Design and Installation Guide, July 2025 (Elevate)